With the recent release of Veeam v13, deployment flexibility has taken another leap forward – now including a seamless Veeam Software Appliance (VSA) option. For organizations running Proxmox VE, this guide walks you through how to deploy the Veeam Software Appliance v13 efficiently on your Proxmox hypervisor.
V13 offers a choice between two deployment options:
1. Installable software for Microsoft Windows (yet to be released)
2. Hardened Software Appliance (for new deployment)
Note: With the release of Veeam Software Appliance v13, there is currently no ability (yet) to convert from v12.x (Windows Based) to Veeam Software Appliance v13 (Linux Based). The in-place upgrade of the existing Windows-based V12 backup servers to V13 will become available with the release of V13 installable software for Windows which is expected in Q4 2025.
Why Use the Veeam Software Appliance?
The Veeam Software Appliance simplifies the installation and management of Veeam Backup & Replication by packaging everything – OS, database, and software into a preconfigured Linux-based image (JeOS). It’s the quickest and cleanest way to get Veeam up and running in virtualized environments like Proxmox, VMware, or Hyper-V, etc.
Preparing the Proxmox VM
When creating a new Virtual Machine in Proxmox to host the Veeam Software Appliance, ensure the following configuration for smooth performance and stability:
Guest OS
Select a Linux (64-bit) operating system type, as Veeam Software Appliance is based on Linux JeOS (Just enough Operating System). Attach the Veeam Software Appliance ISO image as the installation media.
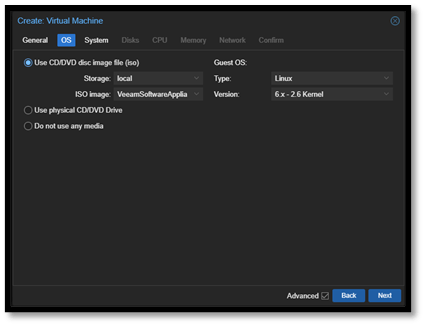
Note: Assuming upload of the Veeam Software Appliance ISO to the Proxmox datastore has already been done.
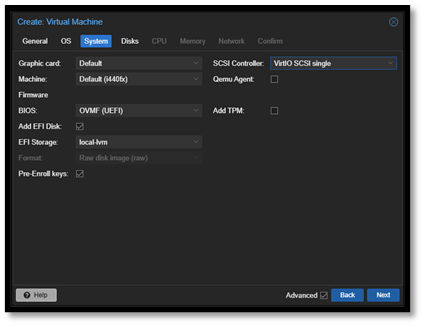
BIOS
Use OVMF (UEFI) with Secure Boot disabled for compatibility and proper appliance boot behavior.
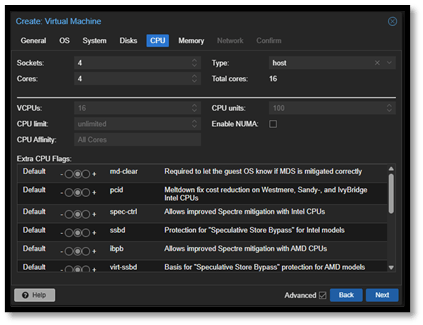
CPU
Allocate an x86-64 processor, with 8 cores minimum recommended for production environments.
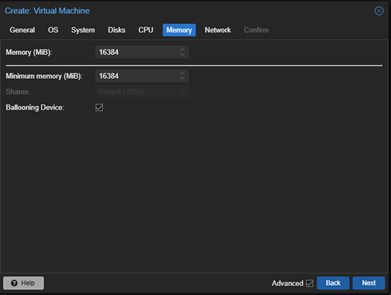
Memory
Provision 16 GB of RAM as a baseline, plus an additional 500 MB per concurrent job to ensure optimal performance under load.
Configuring the Virtual Disks
Veeam recommends separating storage disks for better performance and data management:
Disk 1 – System and Configuration
This disk hosts the Veeam JeOS (base OS), Veeam Backup & Replication software, configuration database, and instant recovery cache.
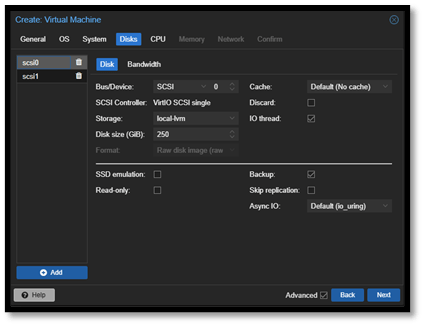
Recommended sizing:
• 240 GB minimum
• 480 GB SSD for small environments (up to a few hundred workloads)
• 960 GB SSD for medium-sized environments (up to a few thousand workloads)
• Multi-terabyte SSD for large environments
Note: A larger capacity allows a larger instant recovery cache — meaning more VMs can be instantly recovered and run directly from backup for longer durations.
Disk 2 – Catalogs and Backups
This disk is used for guest file system catalogs and backup data. All additional disks added to the appliance are automatically joined with Disk 2 using LVM (Logical Volume Manager).
Recommended sizing:
• 240 GB minimum
• Scale up depending on your data retention and capacity needs.
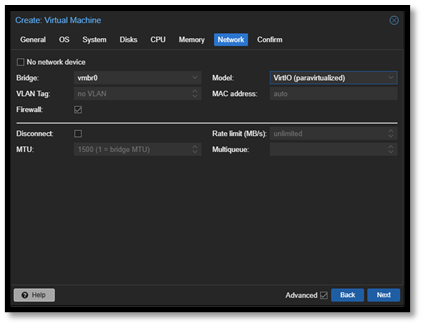
Network Configuration
Ensure your virtual network interface is connected to the correct VLAN or bridge that provides access to your backup repository and production workloads. Using a VirtIO or Intel E1000 network model works well for most Proxmox setups.
Deployment Steps for Veeam Software Appliance
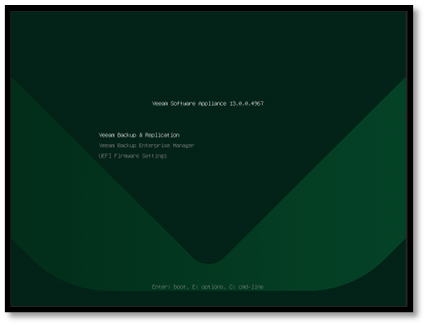
Boot the Proxmox VM and you will be taken into the Veeam Software Appliance setup screen. Select Veeam Backup & Replication
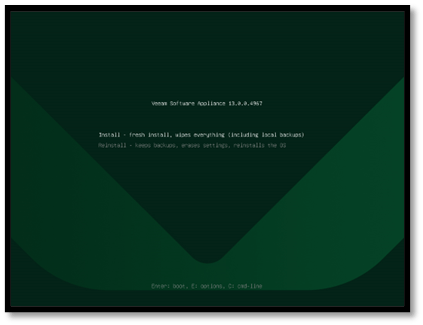
Select Install – fresh install, wipes everything (including local backups)
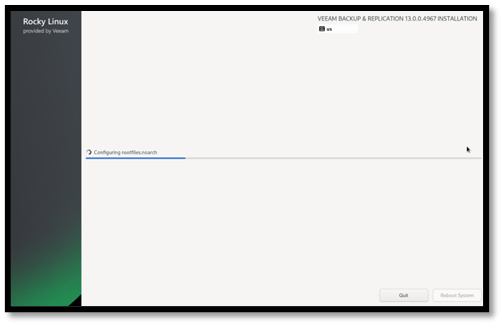
The Veeam Software Appliance OS (Rocky Linux) & VBR software installation process begins.
The Initial Configuration Wizard window appears. Select Accept to confirm you agree with the licensing agreement.
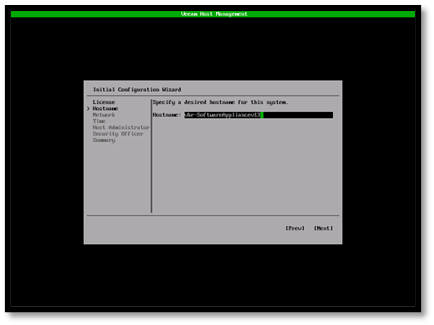
Enter the Hostname for the Software Appliance and select Next.
It is recommended that you use a Fully Qualified Domain Name as a hostname.
The next couple of steps on Network & Time settings will differ depending on your organizational environment. Some configurations to be aware of:
- By Default, all enabled network adapters will be configured to use DHCP. It is recommended to use Static IP.
- Server time affects multi-factor authentication and backup operations, for example, backup job schedule. Configure the following server time settings:
- Time zone. By default, UTC is used. To specify another time zone, select Change.
- Available NTP servers. By default, the time.nist.gov NTP server is used. You can add multiple NTP and NTS servers. It is recommended to use a minimum of 3 to mitigate timing issues.
Note: NTS servers must use a certificate signed by a public certificate authority.
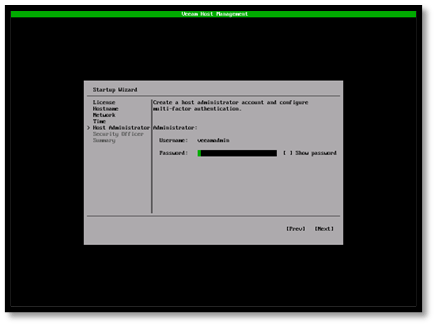
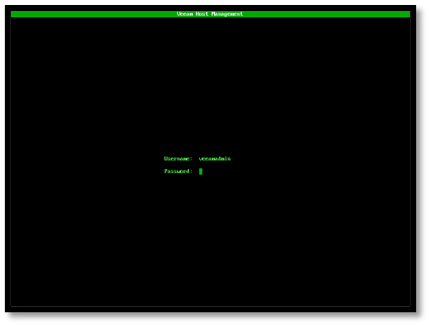
Enter Password for the veeamadmin account and select Next.
The password must comply with the following requirements:
- 15 characters minimum.
- 1 upper case character.
- 1 lower case character.
- 1 numeric character.
- 1 special character.
- No more than 3 characters of the same class in a row. For example, more than 3 lowercase or 3 numerical characters in sequence.
This is the default Host Administrator Account. This Admin User can perform all administrative activities in the Veeam Host Management web UI and TUI:
- Configure network settings
- Configure server time settings
- Configure remote access settings
- Manage users and roles
- Configure backup infrastructure integrations
- Manage software updates
- Perform maintenance tasks
Note: There is no password confirmation/re-entering of the password. Be cautious when entering the password.

Configure multi-factor authentication (MFA):
- Open your preferred authentication application. Enter the code or scan the QR code as displayed on screen.
- Specify the one-time code provided by the application.
- Press Ok.
- You will be taken back to the Host Administrator screen to continue.
Note: With v13, this is a mandatory step to setup MFA during installation. MFA is compatible with mobile authentication applications that support RFC4226 and RFC6238.
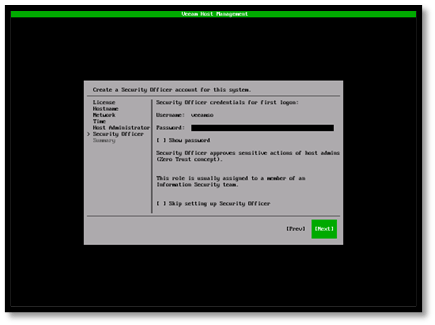
Enter Password for the veeamso account and select Next.
Same password requirements apply as for the veeamadmin account.
This is the default Security Officer Account. The Security Officer User can perform the following operations in the Veeam Host Management web UI:
- Reset user passwords
- Reset user multi-factor authentication
- Manage authorization requests
- Manage password recovery tokens
- Manage configuration backups
- Export events
Note: Security Officer does not have access to the Veeam Host Management TUI (Text User Interface) and it is not mandatory to setup this account. It is however highly recommended to setup at least one Security Officer User as this provides additional layer of protection from insider threats.

The final screen in the Initial Configuration Wizard is the Summary screen, which displays the configurations of the Veeam Software Appliance. Select Finish to complete the Initial Configuration of the Software Appliance. The Login screen below will be displayed.
Accessing the Veeam Host Management Console
You can access a Veeam software appliance through a web browser using its IP address or FQDN for the main interface, or by connecting using the Veeam Backup & Replication console. For direct remote access to the command-line interface, you will need to enable SSH via the appliance’s web UI or TUI (Text User Interface).
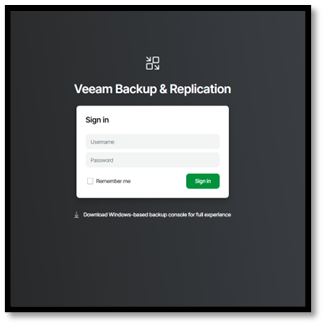
Logging into the Management Console via the Web UI

To log into the Veeam Host Management Web UI, do the following:
- In your web browser, navigate to the Veeam Host Management URL. The URL consists of an FQDN or IP address of the server where the backup infrastructure component is installed, and the Veeam Host Management port. For example, https://192.168.0.102:10443 or https://vbr-SoftwareAppliancev13.local:10443
- Specify user credentials of the Host Administrator (veeamadmin)
- Click Sign in
- If you have enabled MFA for the user, specify the MFA code and click OK
Logging in using Veeam Backup & Replication Console
To download the Veeam console, visit the Veeam product downloads page (www.veeam.com/downloads) and get the main installation image for Veeam Backup & Replication, which includes the console. Alternatively, you can download the console directly from the login page of the web UI as highlighted above.
Some prerequisites to consider before installing the VBR Console:
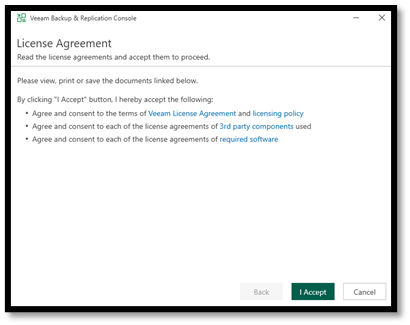
Launch the VBR Console executable and Accept the License Agreement.
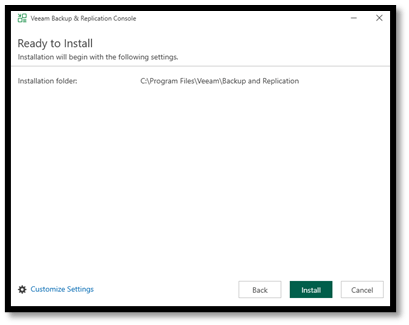
Select Install to start the VBR Console installation process with default setting on Installation Folder location.
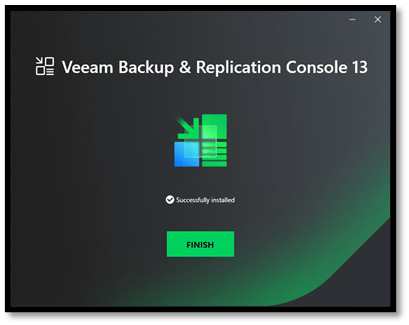
Select Finish to complete the VBR Console installation.

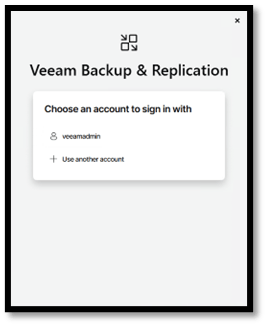
Double click on the VBR Console icon on the desktop to launch the VBR Console.
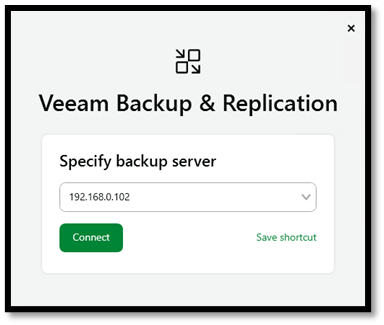
Connect to the VBR Server using either the IP Address or the FQDN & choose the account to sign-in – (veeamadmin)
Final Thoughts
Deploying the Veeam Software Appliance v13 on Proxmox gives you a modern, clean, and efficient way to protect your workloads. With performance-optimized disk allocation and Linux-based architecture, you’re ready to back up, recover, and scale with confidence.
If you’re already leveraging Proxmox for your virtual infrastructure, integrating the Veeam Software Appliance is the next logical step towards a resilient hybrid backup strategy.
Published: October 17, 2025 10:47am

Leave a comment